WorkBuddy Integration
Add KOPRouter as a custom model service in WorkBuddy to use models configured in KOPRouter, with authentication and usage billing handled through a KOPRouter API key.
- Install and sign in to WorkBuddy
- Have an active KOPRouter account with sufficient balance
- Know the exact KOPRouter model name you want to use, such as
deepseek-flash
Core configuration
Connecting to KOPRouter needs three values:
- Base URL:
https://koprouter.kopglobal.com/v1(KOPRouter’s OpenAI-compatible root) - API Key: your KOPRouter API key (prefixed with
sk-) - Model name: the exact KOPRouter model name, such as
deepseek-flash
Option 1: Write to models.json (recommended)
WorkBuddy reads the local config file ~/.workbuddy/models.json. Put all three values there at once — no need to click through the UI.
```bash
mkdir -p ~/.workbuddy
nano ~/.workbuddy/models.json
```
```bat
if not exist "%USERPROFILE%\.workbuddy" mkdir "%USERPROFILE%\.workbuddy"
notepad "%USERPROFILE%\.workbuddy\models.json"
```
Write the following (save the file as UTF-8 without BOM):
{
  "models": [
    {
      "id": "MODEL_ID",
      "name": "KOPRouter - MODEL_ID",
      "vendor": "Custom",
      "url": "https://koprouter.kopglobal.com/v1/chat/completions",
      "apiKey": "sk-..."
    }
  ],
  "availableModels": ["MODEL_ID"]
}
Replace MODEL_ID with the exact model name in KOPRouter.
Option 2: Configure in the UI
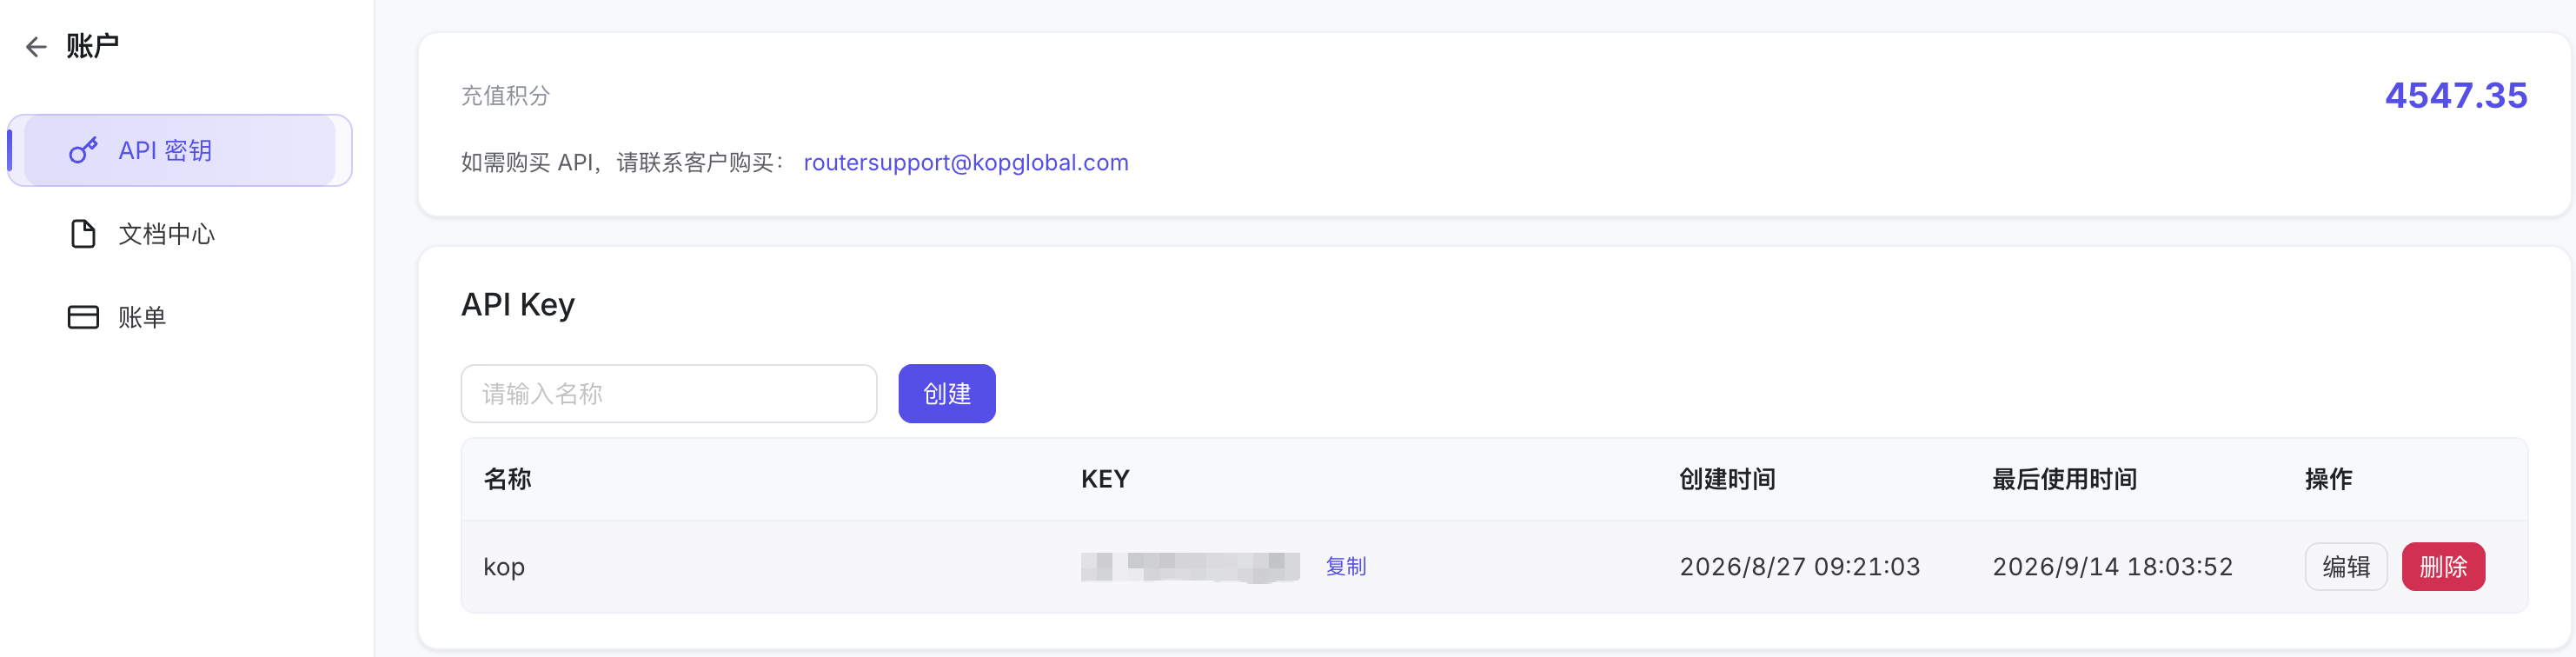
Sign in to KOPRouter, click your avatar in the lower-left corner, and open API Console → API Keys. Enter a recognizable name, such as WorkBuddy, click Create, and copy the generated API key.
API keys normally begin with sk-. Store the key securely and never share it in chats, screenshots, or public documents.
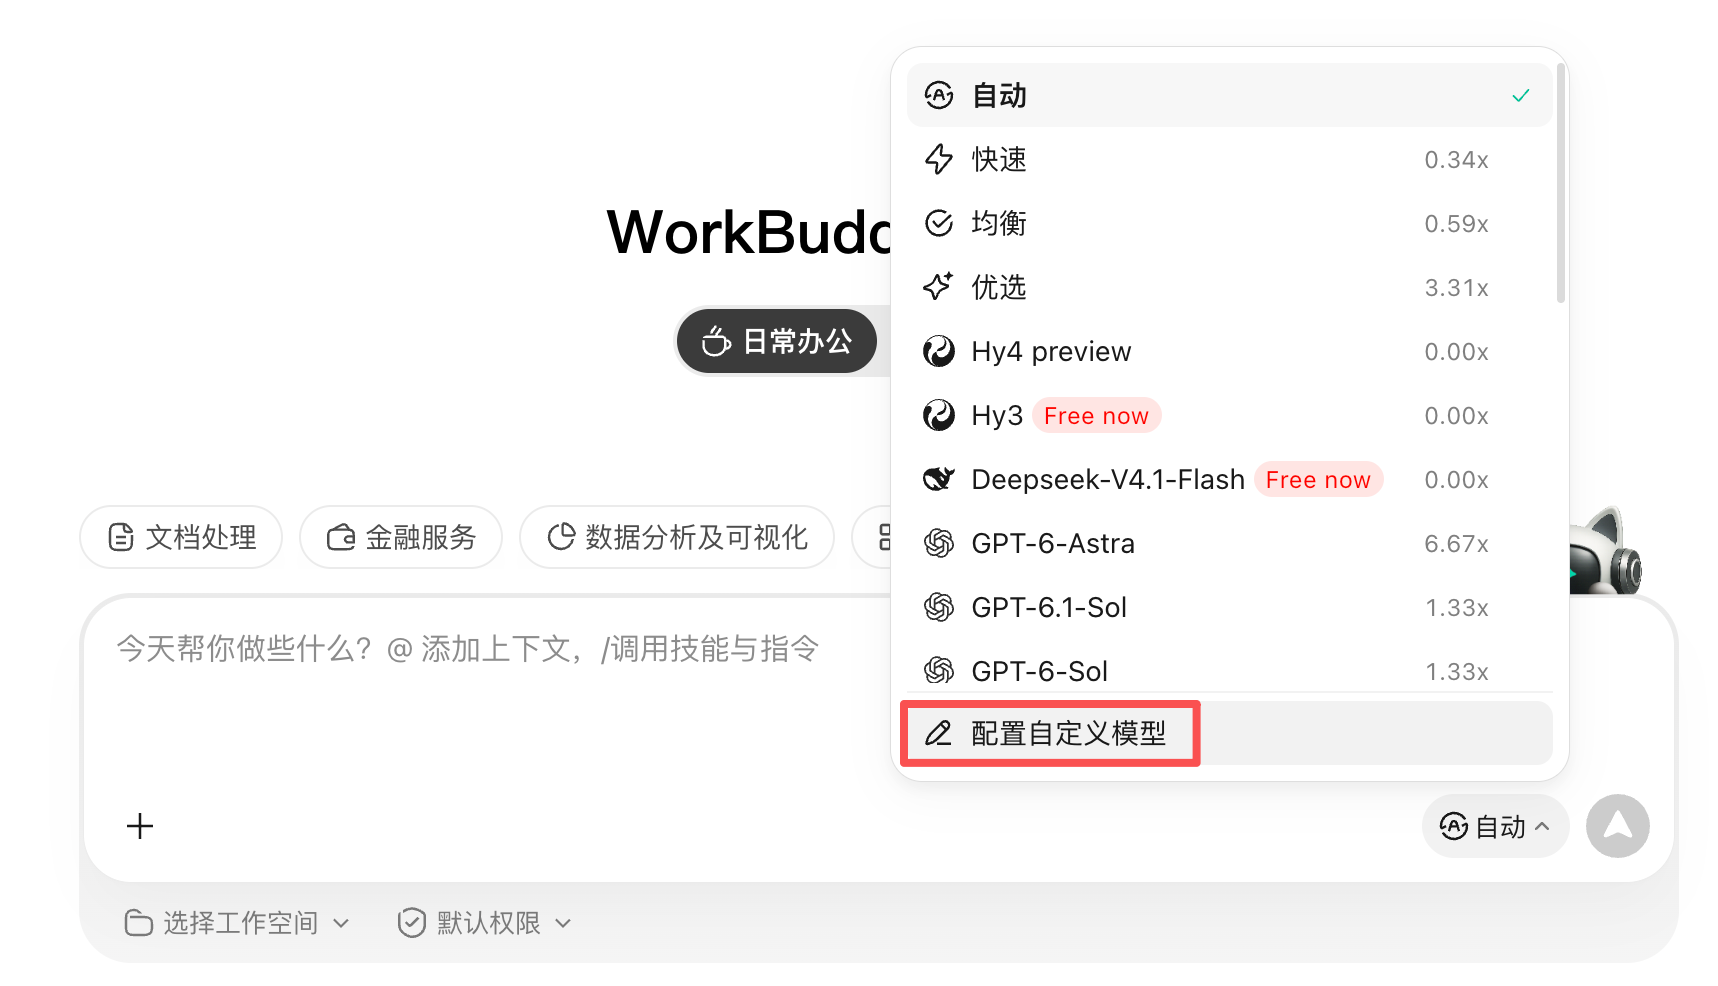
Open WorkBuddy and click the current model name at the lower-right of the chat composer. Expand the model list, then click Configure Custom Model at the bottom.
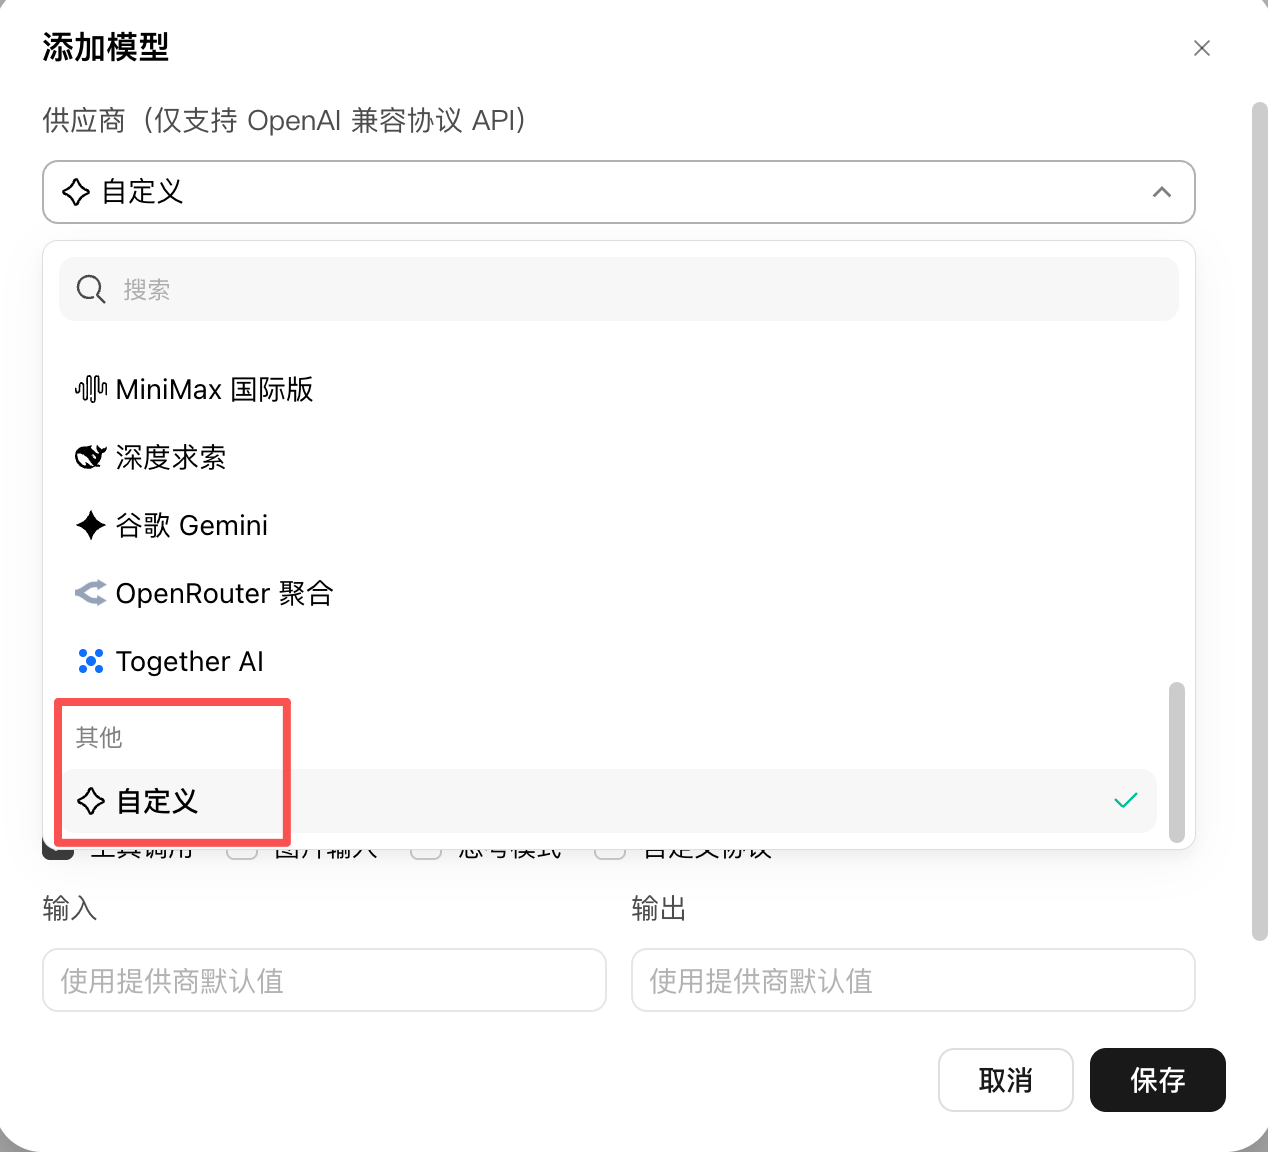
Click Add Model on the custom model page. Open the Provider list and select Custom under Other. KOPRouter exposes an OpenAI-compatible API, so you do not need to select a specific first-party provider.
Complete the model configuration as follows:
Base URLhttps://koprouter.kopglobal.com/v1
API KeyPaste the KOPRouter API key copied in Step 1
Model nameEnter the exact KOPRouter model name, for example deepseek-flash
The model name must exactly match the name exposed by KOPRouter, including capitalization, hyphens, and version numbers. Otherwise, WorkBuddy will report that the model does not exist.
We recommend leaving Custom Protocol disabled. When it is disabled, WorkBuddy automatically appends the standard /chat/completions path to the Base URL. Enable tool calling, image input, and reasoning only when the selected model supports those capabilities.
Click Save when finished. If WorkBuddy offers a connection test, complete the test before returning to the chat page.
Return to the WorkBuddy chat page, open the model list again, and select the model you just added from the custom model group. Confirm that its name appears beside the composer before sending a message.
For the first request, send a short message such as “Reply with OK,” then open Usage Details in KOPRouter and confirm that a record for the selected model appears.
Troubleshooting
https://koprouter.kopglobal.com/v1 with Custom Protocol disabled. If Custom Protocol is enabled, WorkBuddy does not append the endpoint path, so enter the complete URL https://koprouter.kopglobal.com/v1/chat/completions; with models.json, you must always enter the complete URL https://koprouter.kopglobal.com/v1/chat/completions.
If your network cannot reach KOPRouter directly (e.g. mainland China), enter an HTTP proxy address (7890 is an example — use your own proxy port) under WorkBuddy’s “Settings → Network / Proxy” — no environment variables needed; or enable a system proxy (TUN / global mode). See Network & Proxy.